Hello,
lets start with the sonar analysis we will do the analysis of sonarqube code itself.
first we will download or clone the code on local using below command.I have fork from the sonar repo so I will work on this you can do the same with sonarqube repo as well.
$ git clone https://github.com/navneet-rathi/sonarqube.git
After downloading the code from the github you will see its a maven project we have to install the maven first which is pretty straight forward.
after installing maven we need to change the directory and open then sonarqube directory by command
$ cd sonarqube
Lets start with clean and do analysis of sonarqube
$mvn clean sonar:sonar -Dsonar.host.url=http://localhost:9000 -Dsonar.login=admin -Dsonar.password=<your sonar password>
you can even use -X option with maven for debugging info.
and done then just wait and watch and rest of work is done by maven and sonar.
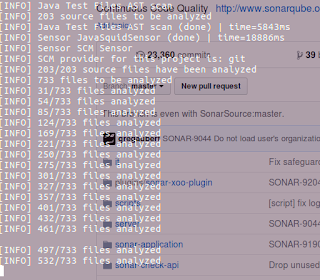
you will see some thing after its start its sonar who is doing analysis.
you can also see some thing like this if you have build breaker plugin install in your sonar.This plugin is useful when you are working with sonar and jenkins together.

Once the analysis is complete on the command line you can go to browser and login in the sonarqube and check the sonarqube code quality check for the project.

You can see some thing like this after the analysis is completed.So this is about the basic use of sonar with maven.In the net article i will show you how you can analysis the pull request in github using sonar if it is ok to merge or not.
lets start with the sonar analysis we will do the analysis of sonarqube code itself.
first we will download or clone the code on local using below command.I have fork from the sonar repo so I will work on this you can do the same with sonarqube repo as well.
$ git clone https://github.com/navneet-rathi/sonarqube.git
After downloading the code from the github you will see its a maven project we have to install the maven first which is pretty straight forward.
after installing maven we need to change the directory and open then sonarqube directory by command
$ cd sonarqube
Lets start with clean and do analysis of sonarqube
$mvn clean sonar:sonar -Dsonar.host.url=http://localhost:9000 -Dsonar.login=admin -Dsonar.password=<your sonar password>
you can even use -X option with maven for debugging info.
and done then just wait and watch and rest of work is done by maven and sonar.
you will see some thing after its start its sonar who is doing analysis.

you can also see some thing like this if you have build breaker plugin install in your sonar.This plugin is useful when you are working with sonar and jenkins together.

Once the analysis is complete on the command line you can go to browser and login in the sonarqube and check the sonarqube code quality check for the project.
You can see some thing like this after the analysis is completed.So this is about the basic use of sonar with maven.In the net article i will show you how you can analysis the pull request in github using sonar if it is ok to merge or not.
