Hello guys,
welcome back on my blog so lets get start with the stuff.
SSL’s primary function on the Internet is to facilitate encryption and trust that allows a web browser to validate the authenticity of a web site. However, SSL works the other way around too – client SSL certificates can be used to authenticate a client to the web server. Think SSH public/private key pairs, if that is familiar to you. In this blog post I will outline the steps to create a certificate authority certificate, sign a server certificate and install it in Apache, and create a client cert in a format used by web browsers.
Generate a certificate authority (CA) cert
The first step is to generate a CA certificate. This CA certificate does not need to be generated on your web server – it can sit on whatever machine you will use to generate SSL certificates. Once created, the CA cert will act as the trusted authority for both your server and client certs. It is the equivalent of the Verisign or Comodos in the real world of SSL, however you wouldn’t want to use your CA cert for a major public website as its trust isn’t going to be built into browsers everywhere.
Generate your CA certificate using this command:
Then keep them secret – keep them safe. If someone were to get a hold of these files they would be able to generate server and client certs that would be trusted by our web server as it will be configured below
Generate your Apache server SSL key and certificate.

welcome back on my blog so lets get start with the stuff.
SSL’s primary function on the Internet is to facilitate encryption and trust that allows a web browser to validate the authenticity of a web site. However, SSL works the other way around too – client SSL certificates can be used to authenticate a client to the web server. Think SSH public/private key pairs, if that is familiar to you. In this blog post I will outline the steps to create a certificate authority certificate, sign a server certificate and install it in Apache, and create a client cert in a format used by web browsers.
Generate a certificate authority (CA) cert
The first step is to generate a CA certificate. This CA certificate does not need to be generated on your web server – it can sit on whatever machine you will use to generate SSL certificates. Once created, the CA cert will act as the trusted authority for both your server and client certs. It is the equivalent of the Verisign or Comodos in the real world of SSL, however you wouldn’t want to use your CA cert for a major public website as its trust isn’t going to be built into browsers everywhere.
Generate your CA certificate using this command:
openssl req -newkey rsa:4096 -keyform PEM -keyout ca.key -x509 -days 3650 -outform PEM -out ca.cer
Then keep them secret – keep them safe. If someone were to get a hold of these files they would be able to generate server and client certs that would be trusted by our web server as it will be configured below
Generate your Apache server SSL key and certificate.
Now that we have our CA cert, we can generate the SSL certificate that will be used by Apache.
- Generate a server private key.
openssl genrsa -out server.key 4096
- Use the server private key to generate a certificate generation request.
openssl req -new -key server.key -out server.req
- Use the certificate generation request and the CA cert to generate the server cert.
openssl x509 -req -in server.req -CA ca.cer -CAkey ca.key -set_serial 100 -extensions server -days 1460 -outform PEM -out server.cer
- Clean up – now that the cert has been created, we no longer need the request.
rm server.req
Install the server certificate in Apache
My server is running Ubuntu 12.04.4 so all paths and commands referenced here are for that operating system.
- Copy the CA cert to a permanent place. We’ll need to specify our CA cert in Apache since it is a self generated CA and not one that is included in operating systems everywhere.
cp ca.cer /etc/ssl/certs/
- Copy the server cert and private key to permanent place.
cp server.cer /etc/ssl/certs/server.crt
cp server.key /etc/ssl/private/server.key
- Activate the SSL module in Apache.
a2enmod ssl
- Activate the SSL site in Apache and disable the HTTP site.
a2ensite default-ssl
a2dissite default
- Edit /etc/apache2/sites-enabled/000-default-ssl (the config file for the SSL enabled site) and add:
SSLCACertificateFile /etc/ssl/certs/ca.cer SSLCertificateFile /etc/ssl/certs/server.crt SSLCertificateKeyFile /etc/ssl/private/server.key SSLVerifyClient require #This is IMP line to make the thing work - Apply the config in Apache.
service apache2 restart
Generate a client SSL certificate
- Generate a private key for the SSL client.
openssl genrsa -out client.key 4096
- Use the client’s private key to generate a cert request.
openssl req -new -key client.key -out client.req
- Issue the client certificate using the cert request and the CA cert/key.
openssl x509 -req -in client.req -CA ca.cer -CAkey ca.key -set_serial 101 -extensions client -days 365 -outform PEM -out client.cer
- Convert the client certificate and private key to pkcs#12 format for use by browsers.
openssl pkcs12 -export -inkey client.key -in client.cer -out client.p12
- Clean up – remove the client private key, client cert and client request files as the pkcs12 has everything needed.
rm client.key client.cer client.req
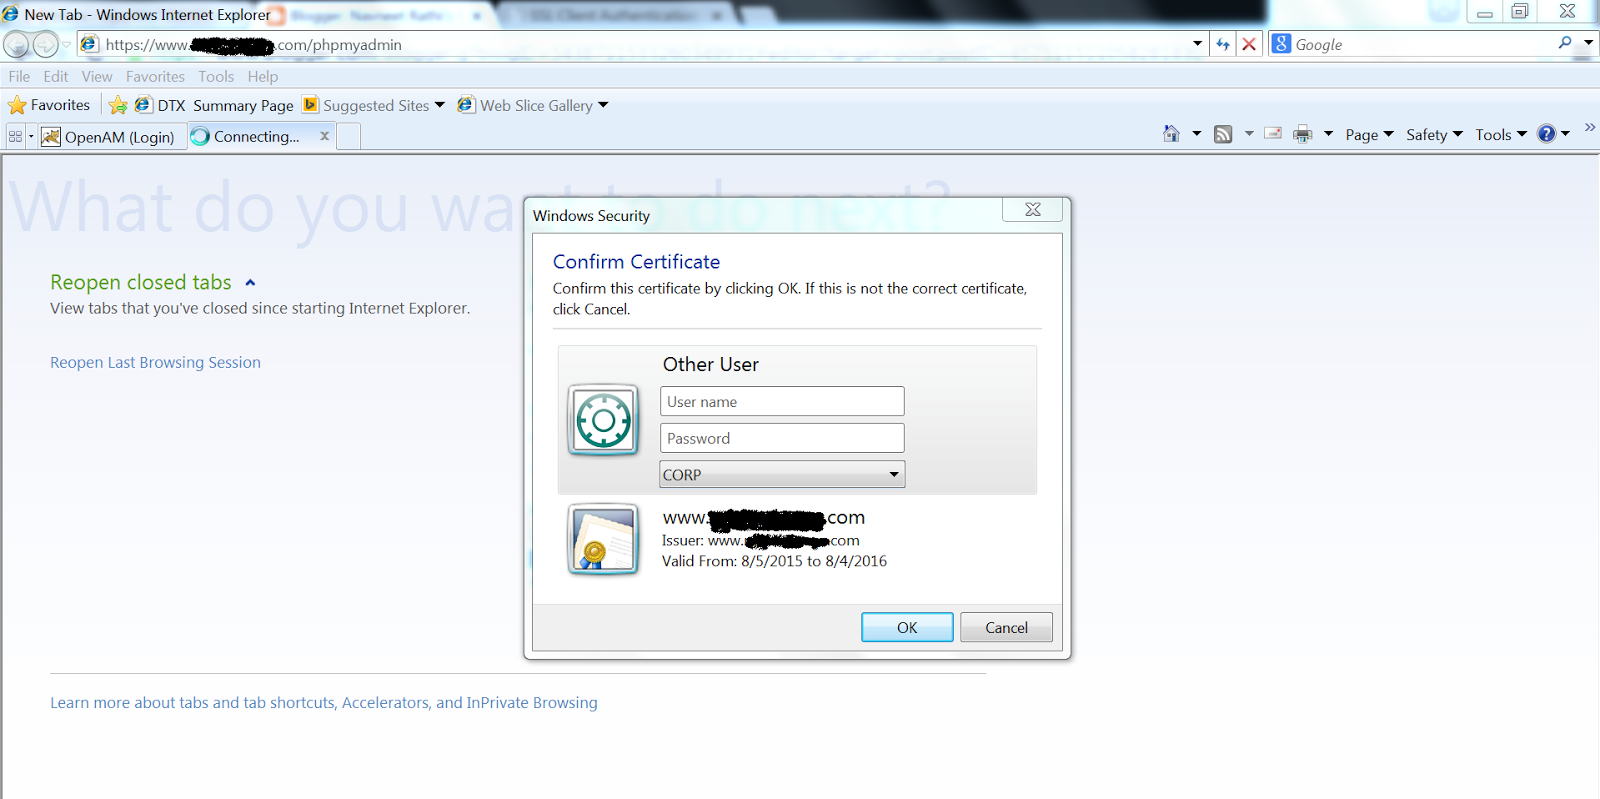
Looks like a pretty similar process to generating a server certificate, huh?Lastly, import the .p12 file into your browser. On Windows you can double click the file to import into the operating system’s keystore that will be used by IE and Chrome. For Firefox, open the Options -> Advanced -> Certificates -> View Certificates -> Your Certificates and import the certificate.Now, visit your website with the browser where you imported the client certificate. You’ll likely be prompted for which client certificate to use – select it. Then you’ll be authenticated and allowed in! - Generate a private key for the SSL client.
Right now if you visit your https site, you will get an SSL error similar to “SSL peer was unable to negotiate an acceptable set of security parameters.” That is good – it means your site won’t accept a connection unless your browser is using a trusted client cert. We’ll generate one now.
as you can see in the below screen you will be only able to access the containt if you have the client cert.I have make few part dark for privacy..Hope you will get it.. Thanks and enjoy...
No comments:
Post a Comment